Tuesday, November 16, 2010

Fall and Thanksgiving Cricut resources

I made a Thanksgiving matching game for the week of Thanksgiving. I used the Cricut Classmates Cartridge called Speaking of Fall.


Before my class studied Thanksgiving after we studied Fall. We made a mural  using the Speaking of Fall Cartridge for the word Fall made out of leave shapes. The Turkeys, apple baskets,pumpkins,leaves, rake, and cornucopia are from that cartridge also. The tree and apples are from the My World cartridge. The clouds are from the Create a Critter. The sun is from Life is a Beach.

After Thanksgiving we studied Farms, followed by Pumpkins &Vegetables, and then Halloween.

Painting with the Cricut

Here are pictures of some of the art I have done with my children using the Cricut.

  
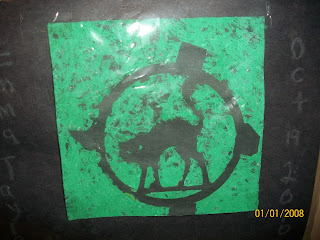
I used a shape from the Pumpkin carving cartridge and taped it to the black construction paper. I then put the paper and stencil in a Pringles tall chip can and added the marbles. The children then picked their paint color and I poured it in the can. I put the lid on the can and taped it on. The children each shaked the can with their art work. After the pictures dried they looked like this.

I used the Pumpkin carving cartridge to make the pumpkin shapes. I cut out a bunch of different faces for the pumpkins. I let the children choose the face they would like on their pumpkin. I taped the face stencil to the pumpkin. The children then used sponges to sponge paint over the stencil to make their own jack o lantern. The children loved this activity.


I used the Freshly Picked cartridge to make the flower stencil. Children picked which flower stencil they would like to use. The children painted with a paint brush or coloured with markers and pencil crayons their stencil picture. This picture is using the Marigold shape. I used the shape left over from the stencil to make a flower collage with my class. I also make the flower name shape markers and the gate, pavilion, and watering can.

My whole Cricut classroom in pictures

Here are pictures of my whole classroom. Cricut truly is everywhere in my classroom.


Making Cricut Murals/Collage

I used the Cricut to make classroom Murals that my children work on together over the week of focused program planning. I have the children help sponge paint the background.

The children painted some of the black shapes by using various methods to work on developing their fine motor skills. Children sponge paint, marble paint, finger paint, and paint shapes with paintbrushes while the shapes are taped on the back to a piece of construction paper or thin cardboard.

The Children also used blacked stencils of shapes from the Cricut to sponge paint shapes directly on the Mural background. I taped the stencils to the background with small piece of tape to make it easy to remove when the paint is dry.

When the art dries the children decide where to place. As a group we talk about where the art could go and why.

I added a few shapes on the murals to encourage interest and discussion about the mural and its shapes.

To keep interest in the murals I try to keep each one different with each having separate ways to decorate the background. With the Halloween Mural I made the shapes and glued them together. The children painted the background by sponge painting. When it was dry I brought out the shapes and had the children decide where each should go. They decided where the house should go. They decided where the pumpkin patch should go. They discussed with me where the trees should go. We talked about trees needing to be on the ground so it can have water for a drink. They discussed where the moon and clouds should go.  Each shape was taped down. Normally I glue them done but the glue I had available would not hold down the shapes so I used take instead as it was what was available,


Multicultural Room Display

I bought and cut up a Multicultural Banner from Scholar's Choice. I taped down the pictures on top of my shelf with packing tape so that my children could not pick off the pictures. I left enough spaces that I could include pictures of the children in my class. I tape down the children's pictures separately to make it easier to remove the pictures when needed to update the display. I used the Cricut to add the work US in the centre of it all.

My Cricut Room Decorations


Monday, November 15, 2010

Cricut Educational Teaching Tools

I have made so many educational teaching tools with my Cricut for the classroom walls.


Expanding the Building/Block area

I used my Your Story laminating and Binding machine to laminate the Seven Wonders of the World pictures I found on the Internet. I post the pictures and put them in the block area for the children to look at to possibly inspire their building shapes and structures.

Posting a class routine/schedule in a small space

I used my Cricut to make a sign to post beside my class schedule for the day.

Posting classroom curriculum/schedule in a large space

I made this wall display for a colleague of mine to post the schedule and curriculum for her classroom.


Using the Cricut to make Bulletin Boards

I have used my Cricut to make my Bulletin Boards more interesting and easier to update.


Using the cricut to decorate the children's cubby

I have made cubby tags/ coat hook labels with my Cricut. I laminate the cards with the Your Story machine. This saves me time as when children leave my program I simply remove the label maker name sticker. I also have made licensed character tags for each child's cubby. The children love them as it keeps them busy during the dressing time looking at and naming the characters.


Sunday, November 14, 2010

Child Classroom Identification Tag

I used my Cricut to build Name Tag or Identification Cards to assist Supply Staff and Teachers in working with the children. Everyone loved them. Parents were sure to ask that the name tags were added to their child's portfolio as they cherished them. Cartridges used were: Zoe-Sesame Street Friends, Surfboard (praise)Word Builders 3: An Ocean of Words, Race care driver-Paper Dolls for Everyday, Puzzle Piece Name-Learning Curve. I have covered the child's picture in the centre of the card to maintain confidentiality.

Class name display -Scrabble Board style

I used the Learning Curve cartridge which has the scrabble tiles shape on it. It looks great and if Velcro is used it can be reused as your children graduate or leave your class. I used glue so I have had to make new name boards for each change. My next board will utilize Velcro to save time.